mrtd 16 TRAINING AND INSTRUCTIONS
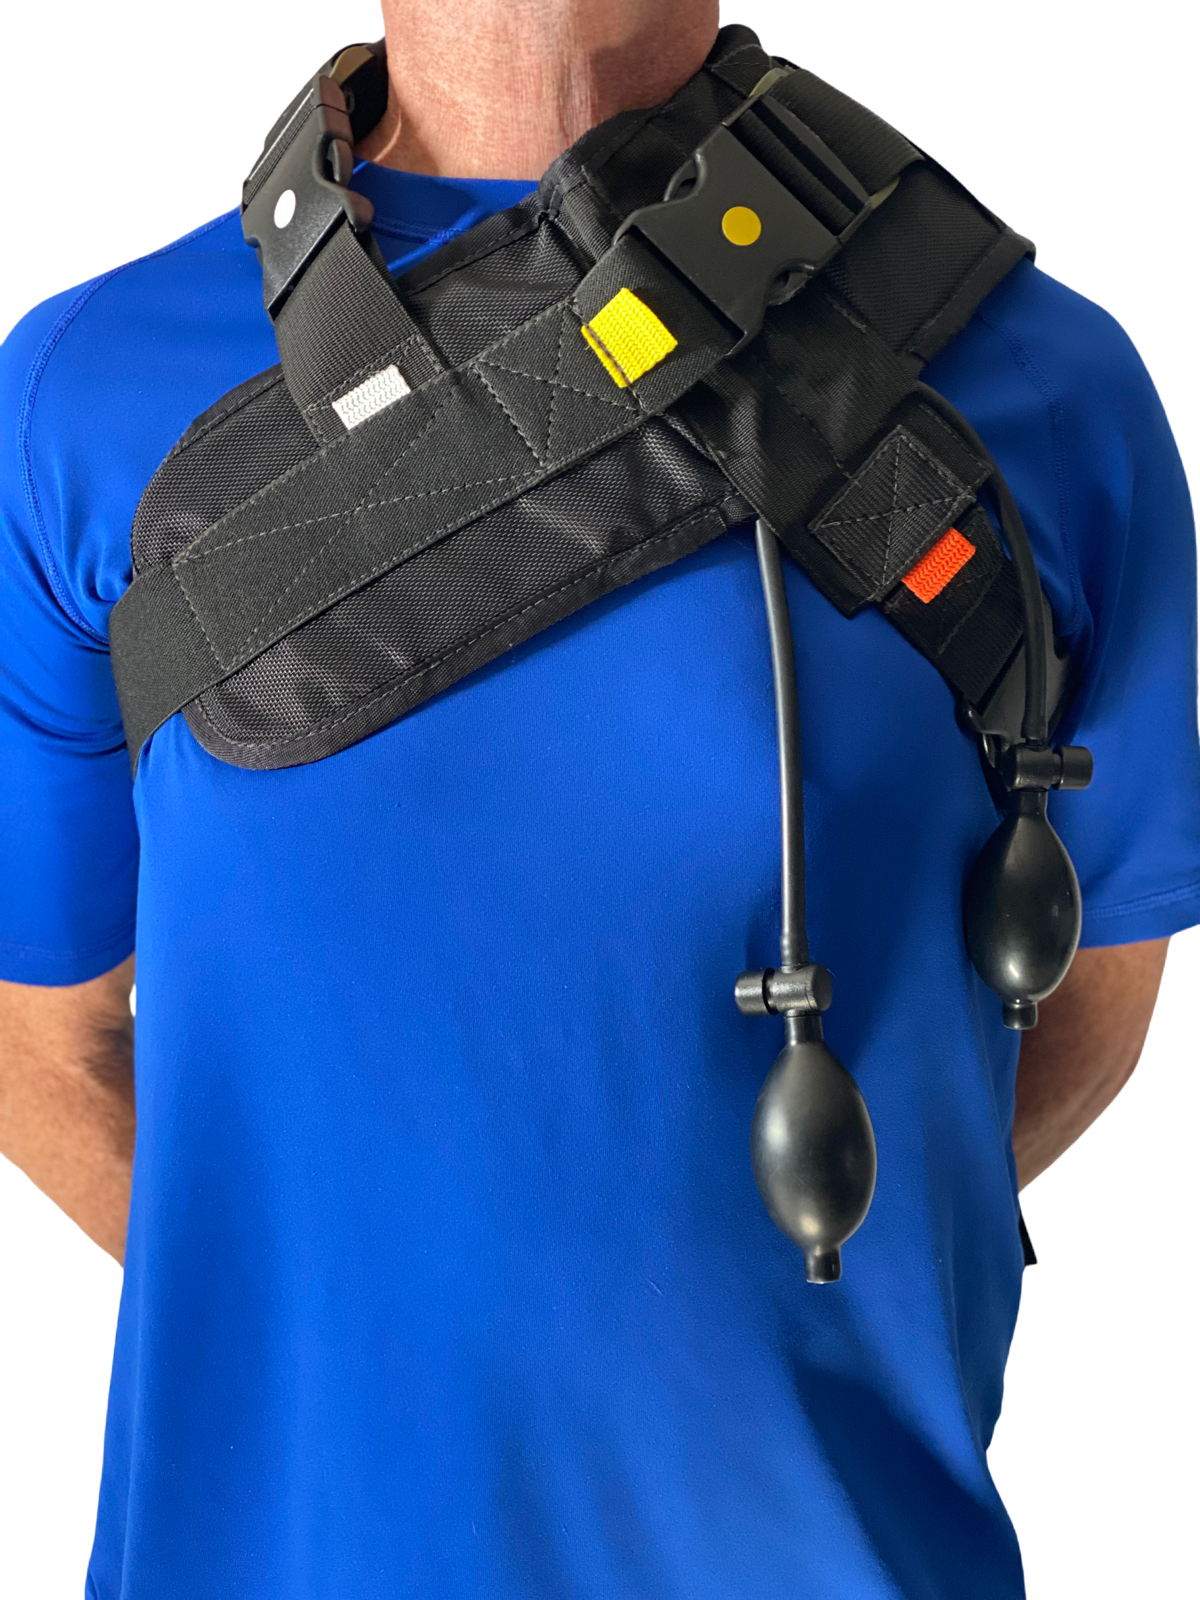
The MRTD 16 is a pneumatic junctional tourniquet trauma device to restrict blood flow and/or cut off blood flow to a wounded area of the body in these 16 regions: Thoracic, Mammary, Abdominal, Umbilical, Coxal, Pubic, Inguinal, Axillary, Femoral, Sternal, Brachial, Dorsal, Lumbar, Sacral, Acromial and Gluteal; by direct or indirect pressure.
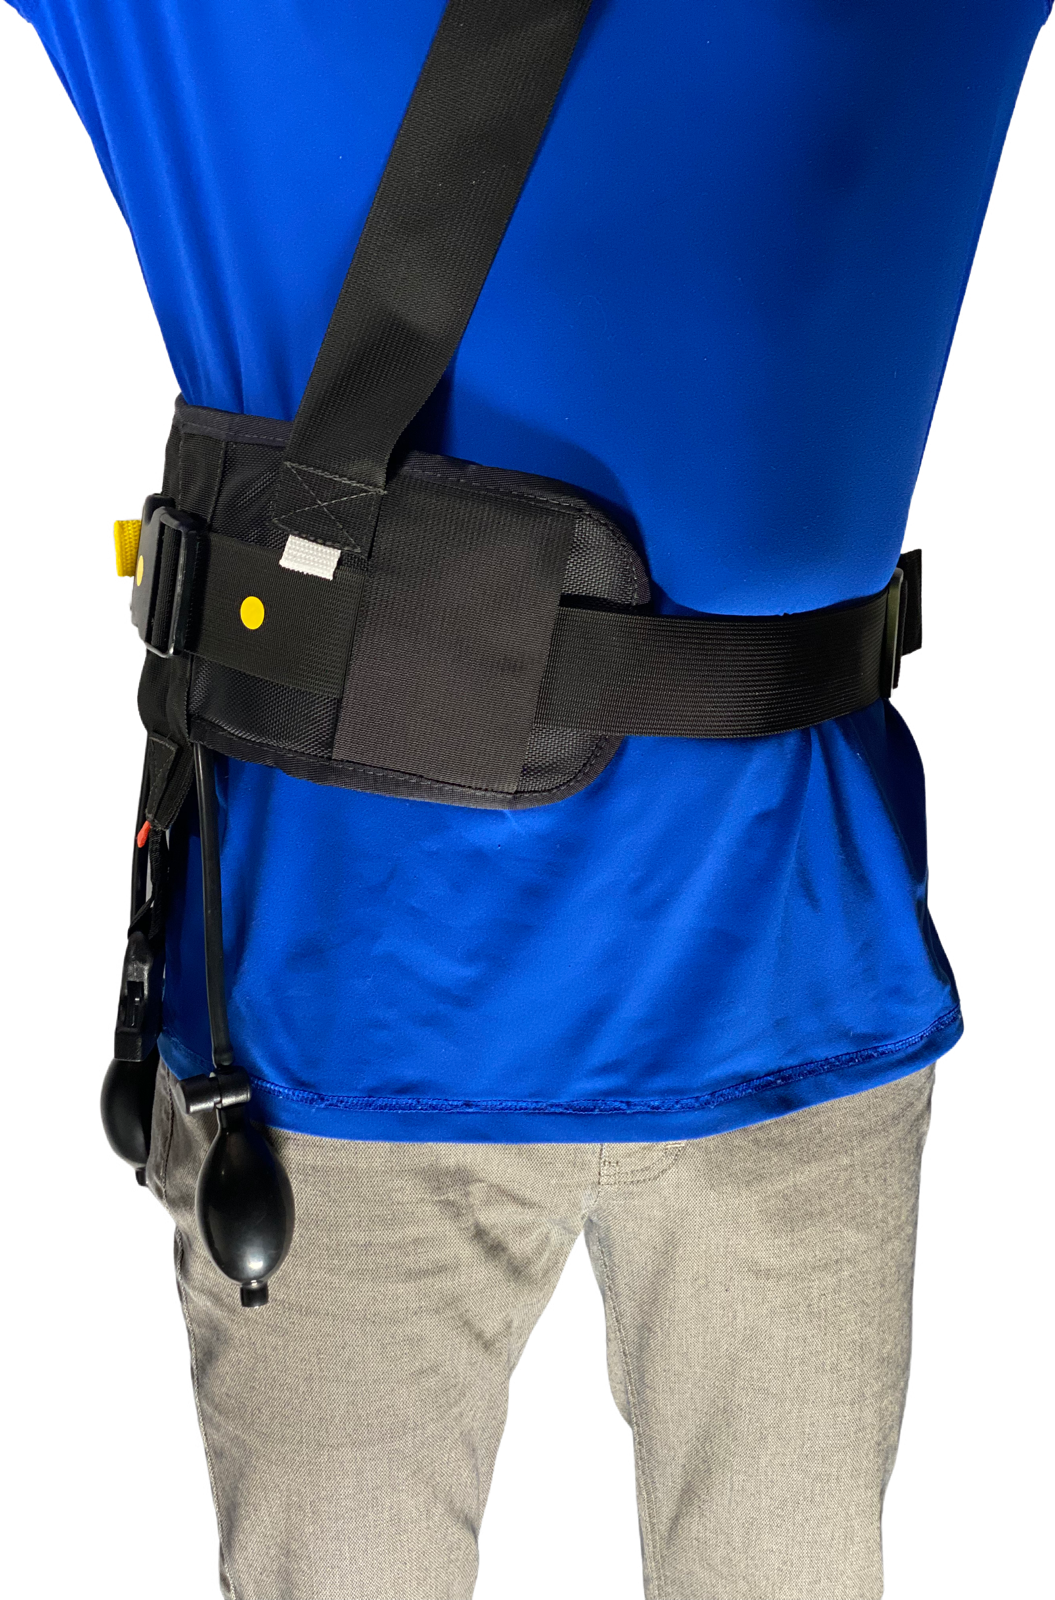
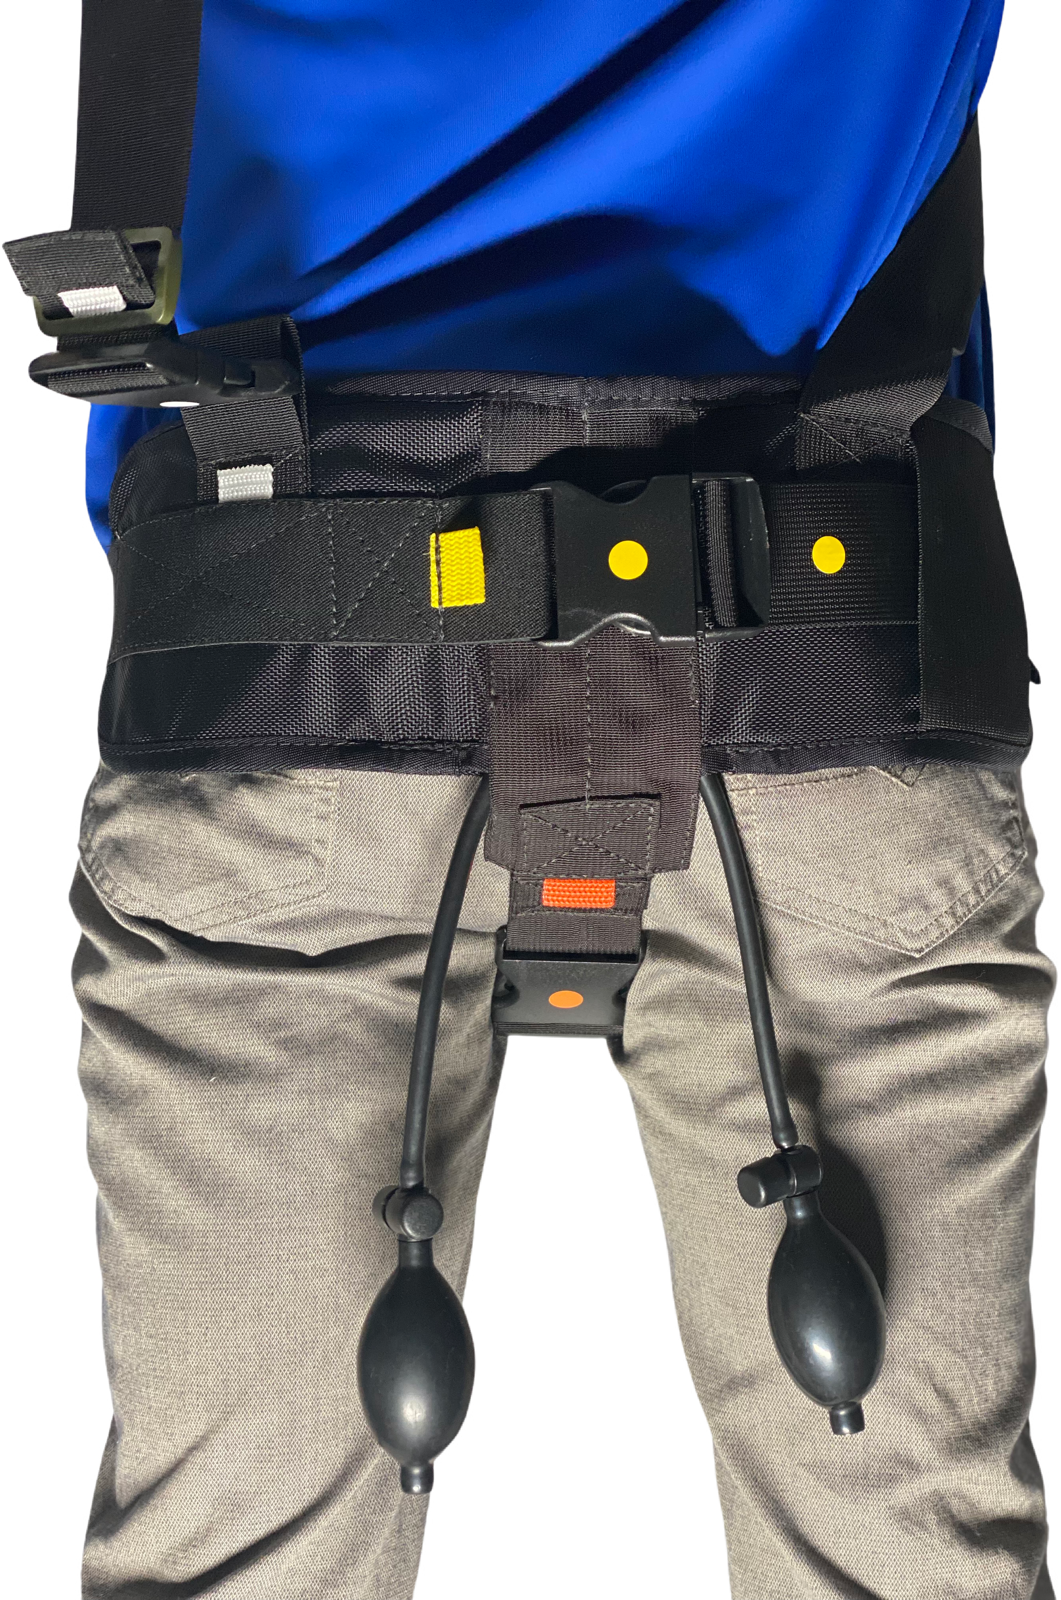
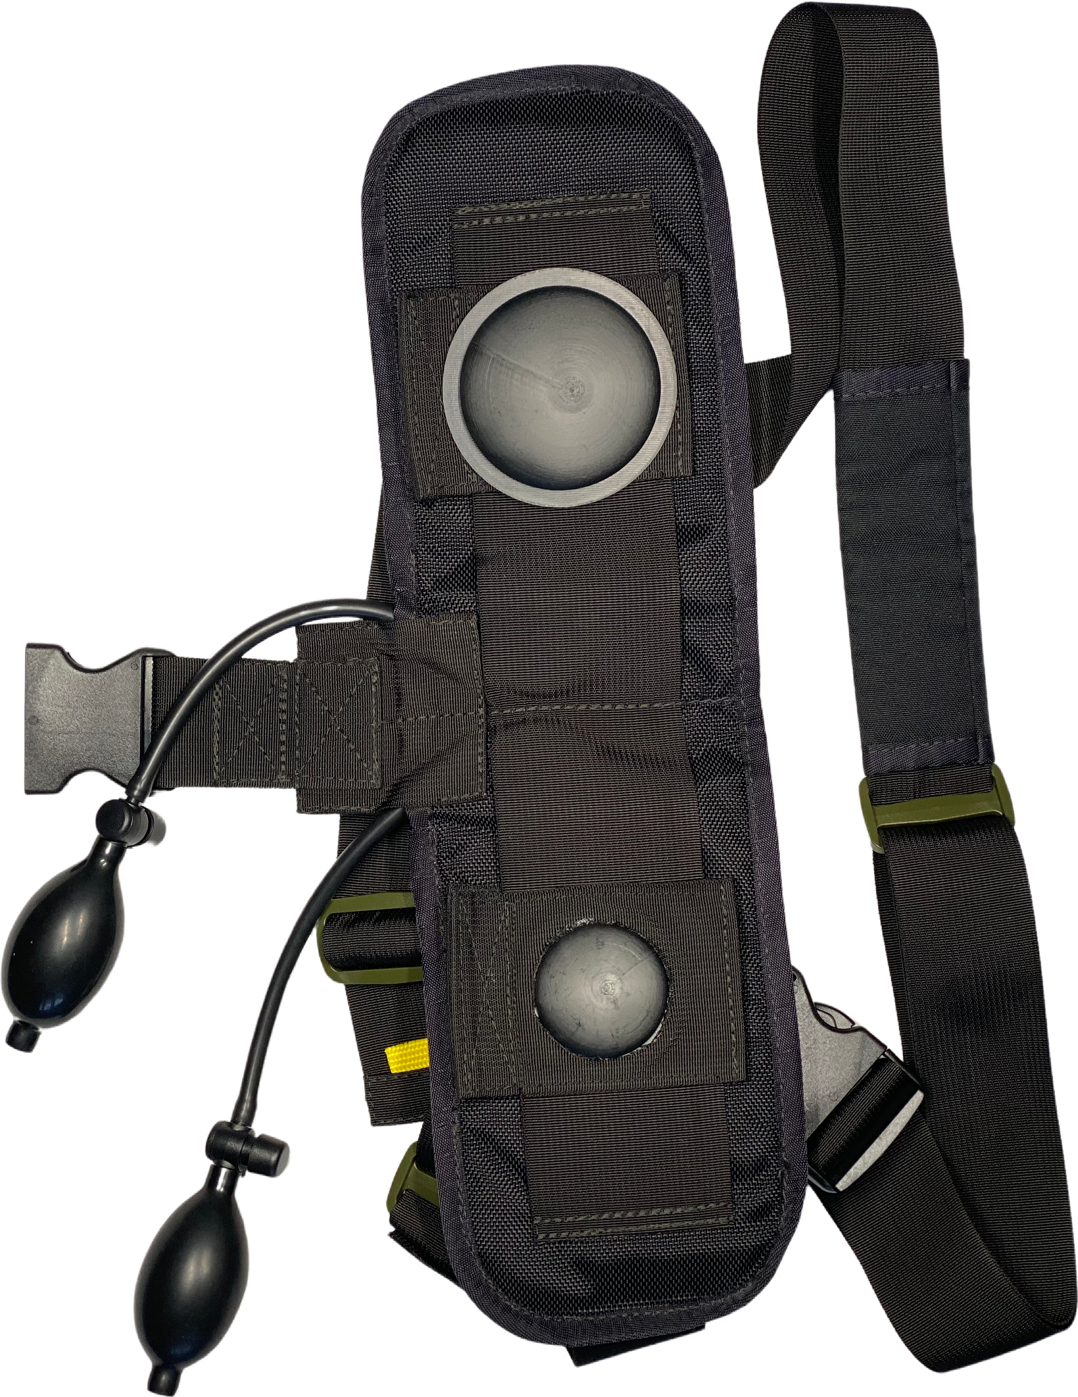
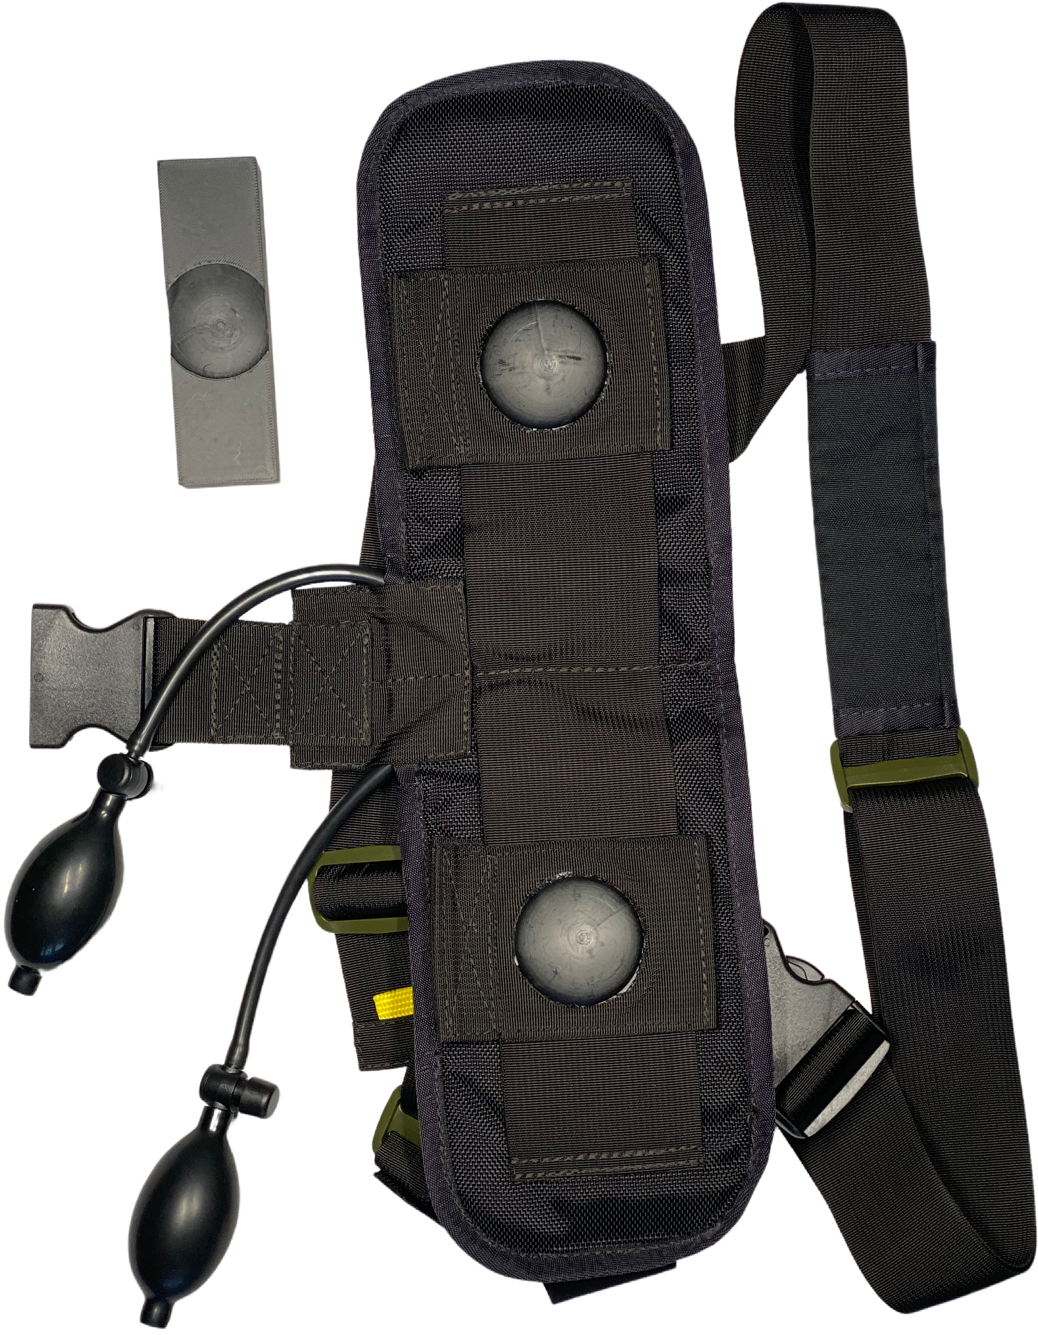
The MRTD 16 consists of: A belt that can be worn around the body and can be adjusted in different configurations to slow or prevent bleeding/hemorrhaging with direct or indirect pressure. With direct pressure, the blood flow can still possibly remain without completely cutting off circulation as a regular tourniquet does. The puck wallets sit on a sliding strap that can be moved in or out, or removed completely, depending on the type of pressure (direct or indirect). Direct being the puck(s) can be put against the wound to cut off blood flow, without cutting complete blood flow to areas around the wound-moreover direct pressure directly on the wound(s). If puck wallets are removed, where an indirect pressure is needed in these regions, the MRTD 16 can be placed over the wound where pinpointed pressure is not needing to be applied. The puck wallet(s) can be placed anywhere on the devices strapping for different configurations depending on the wound location.
NO RX REQUIRED
1-The MRTD 16 configuration for groin (iliac) to chest: Thoracic, Mammary, Abdominal, Umbilical, Coxal, Inguinal, Axillary, Sternal, regions (EXCEPT for Acromial, Gluteal, Pubic and Femoral which will be explained below). These regions are done by:
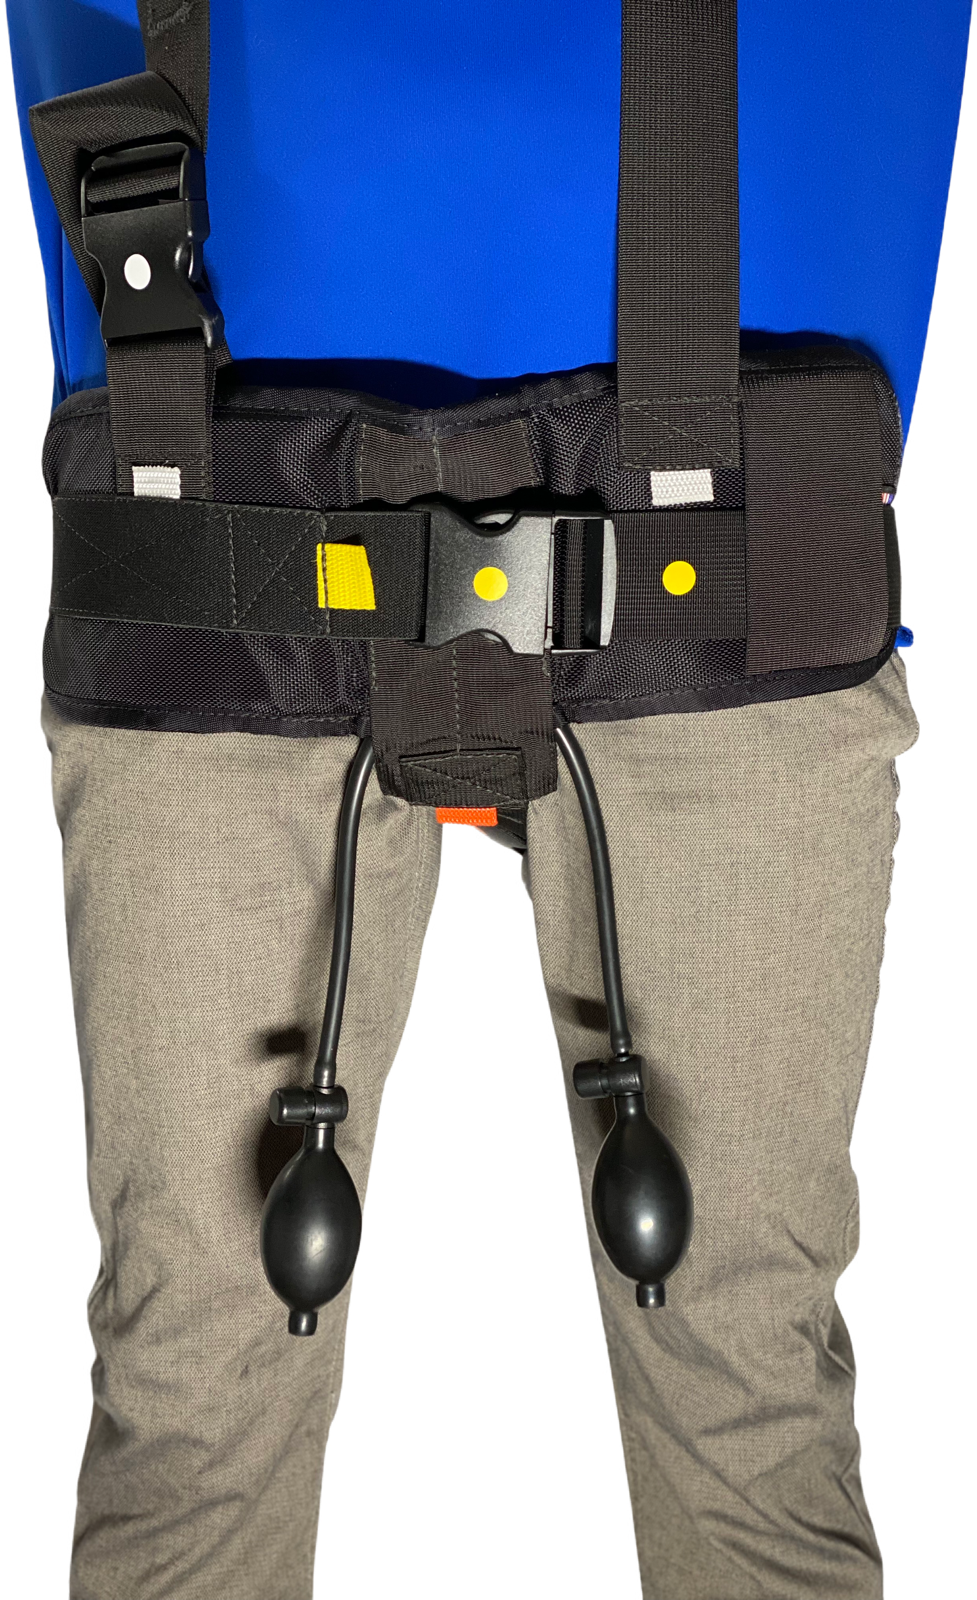
Adjust the white tagged neck strap accordingly. Placing the neck strap over the head-looking for the white color tabs (connecting white to white).
Once neck strap is in desired location on individual, move puck wallets in or out to go over the arteries/wounded area or on the wound itself, with the main belt buckle facing outwards.
Once in desired area, taking into consideration if needing direct or indirect pressure (leaving the puck wallets on or removing them) (see 7-7A and see videos above). Run main body belt strap with yellow tag around the waist, putting it through the 3” body belt keeper strap, then clipping female end into male end of the main body belt yellow strap.
Next, run the orange tagged crotch strap under groin area and snap female end into male end of orange strap.
Once all straps are connected begin tightening straps, taking into consideration the pucks are staying on the desired areas (if puck wallets are being used for direct presser).
Once the device is firmly installed, pneumatic bladders can be inflated by pumping the pneumatic bulbs to desired pressure to create coagulation or completely stop the flow of blood.
Note: Depending on the size of the wound, the large puck adapter or laceration block adapter may be needed in this region (see 7-7A and see videos above). It is applied by placing it over the small puck on puck wallet and then placing it over the wound or over affected area. If indirect pressure is needed, remove puck wallets. Continuous patient monitoring is vital when using the MRTD 16 device.
2-The MRTD 16 configuration for abdominal regions: Abdominal, Umbilical, Coxal follow steps of configuration 1:
Adjusting the yellow, orange and white straps accordingly to bring the device higher up on the body to these regions.
Note: As the MRTD 16 is used higher up on the body, the neck strap will be shortened and the crotch strap will be lengthened. At a point, the extra accessory brown tagged strap will need to be snapped onto the crotch strap to allow the device to reach upper areas. The brown crotch accessory strap can be used to extend any strap with a belt buckle.
Note: Depending on the size of the wound, the large puck adapter or laceration block adapter may be needed in this region (see 7-7A and see videos above). It is applied by placing it over the small puck on puck wallet and then placing it over the wound or over affected area. If indirect pressure is needed, remove puck wallets. Continuous patient monitoring is vital when using the MRTD 16 device.
3-The MRTD 16 configuration for right or left kidney region:
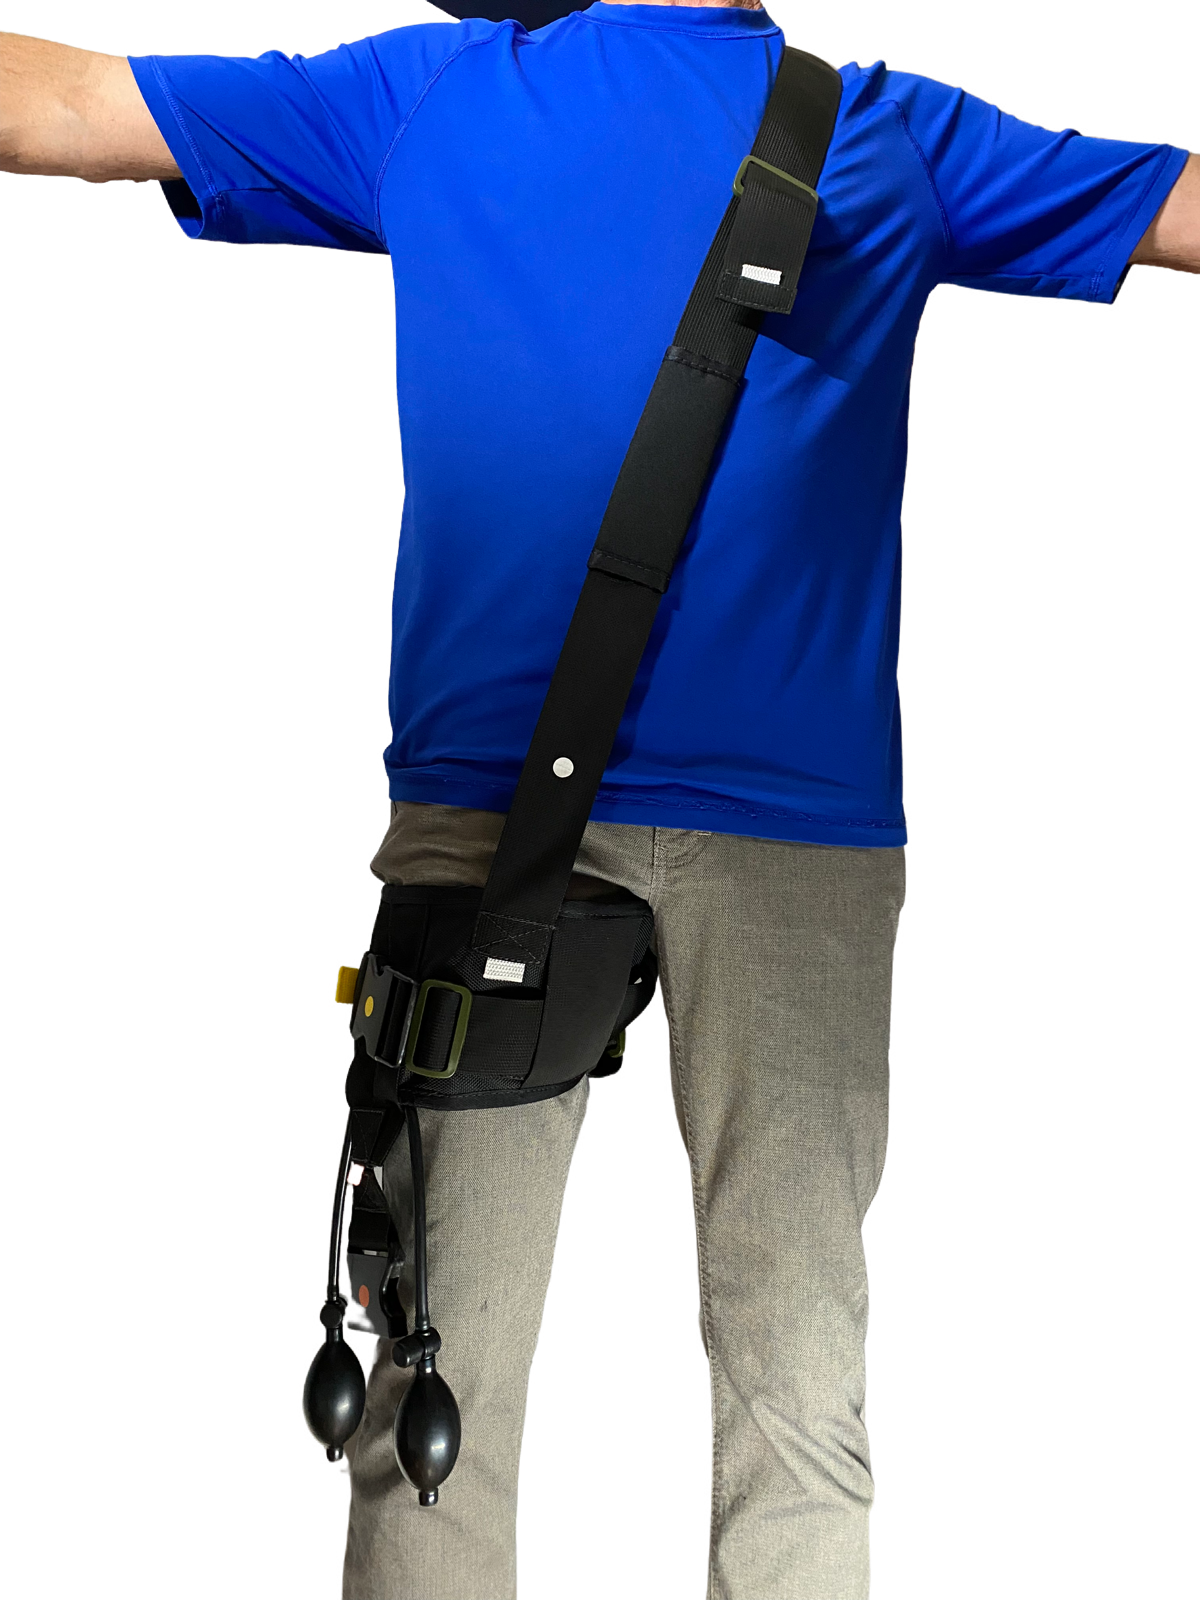
Placing the neck strap over the head-looking for the white color tabs (connecting white to white).
Run right or left arm of the same side of the injury through the neck strap; then depending on what side the injury is on, the neck strap goes over the head, laying on the neck on the opposite side of the wound on the body.
Adjust neck strap to the height of the wound in kidney region. Take yellow tagged body belt strap and run it around the waist through the body belt 3” keeper sleeve on the body belt, taking the female yellow tagged side of the buckle and snapping it into the male side of the yellow tag labeled buckle.
Adjust the pucks as needed for pinpoint pressure. If indirect pressure is needed, remove the puck wallets.
Keeping an eye on positioning of puck and bladder-once in desired/affected area, inflate bladder(s) to desired pressure. Reiterating if white tag labeled neck strap is needing to be on right or left side, adjust your right or left arm going through accordingly.
Note: Depending on the size of the wound, the large puck adapter or laceration block adapter may be needed in this region (see 7-7A and see videos above). It is applied by placing it over the small puck on puck wallet, then placing it over the wound or over affected area. If indirect pressure is needed, remove puck wallets.
Note: As the MRTD 16 is used higher up on the body, the neck strap will be shortened and the crotch strap will be lengthened. At a point, the extra accessory brown tagged strap will need to be snapped onto the crotch strap to allow the device to reach upper areas. The brown crotch accessory strap can be used to extend any strap with a belt buckle. Continuous patient monitoring is vital when using the MRTD 16 device.
Five separate accessories that are built to work with the pneumatic tourniquet trauma device are: Note: See figure 7-7A below and see videos above for how to place the adapters.
Two puck wallets which are attached to the main belt, can be removed and moved anywhere on the straps, or can be left on the 3” slider belt which they come on when purchased;
The large puck adapter that adapts the smaller puck wallet(s) to a larger size for larger wounds;
The laceration block adapter that adapts the puck on the puck wallet(s) to a flat surface that can help with lacerations and for use of the laceration block in any of the areas described below. The laceration block can be placed over either puck on the puck wallet;
The crotch strap extension that can be snapped onto the crotch strap or neck strap as a longer extension and used by individuals that have a longer torso.
4- The MRTD 16 configuration for lower back regions Lumbar, Sacral, Gluteal: Refer to configuration 3 and instead of stopping where kidney is:
Spin the main MRTD 16 body belt around your back to where it is sitting square on your lower back, then grab orange tag labeled crotch strap running underneath groin and attach female end of buckle to orange tag labeled male end of buckle in back.
Adjust the pucks as needed for pinpoint pressure. If indirect pressure is needed, remove the puck wallets.
On upper back regions (Dorsal/Sternal) refer to configuration 3; with tightening the straps-keeping an eye on positioning of puck/bladder, making sure it’s over desired/affected area.
Once straps are tightened, then inflate bladder(s) to desired pressure. This can be done for either right or left inguinal area- making sure the neck strap is opposite the affected area over the head.
Note: Depending on the size of the wound, the large puck adapter or laceration block adapter may be needed in this region (see 7-7A and see videos above). It is applied by placing it over the small puck on puck wallet, then placing it over the wound or over affected area. If indirect pressure is needed, remove puck wallets.
Note: As the MRTD 16 is used higher up on the body, the neck strap will be shortened and the crotch strap will be lengthened. At a point, the extra accessory brown tagged strap will need to be snapped onto the crotch strap to allow the device to reach upper areas. The brown crotch accessory strap can be used to extend any strap with a belt buckle. Continuous patient monitoring is vital when using the MRTD 16 device.
5-The MRTD 16 configuration for the Femoral region (the upper leg/thigh):
Put the crotch extra accessory extension strap on first (see 7-7A) by using brown tag labeled crotch extra accessory extension strap and attaching white tagged female neck strap side of buckle to the male orange tag labeled crotch extra accessory extension strap buckle.
Attach female brown tagged extra accessory extension strap to white male neck strap.
Put arm and head through neck strap, having neck strap on opposite side of the body of the wound.
Take the main body belt strap yellow female side of the buckle and put through 3” keeper strap, snapping it into yellow tagged male side of buckle.
Once in place, tighten straps and adjust the pucks as needed for pinpoint pressure. If indirect pressure is needed, remove the puck wallets.
Keeping an eye on positioning of puck and bladder-once in desired/affected area inflate bladder(s) to desired pressure by using the pneumatic bulb(s). If the main crotch strap can’t be tucked away or tied off, cut off 6-8 inches away from the buckle (only if there is not a chance of it catching or coming loose from the buckle).
Note: Depending on the size of the wound, the large puck adapter or laceration block adapter may be needed in this region (see 7-7A and see videos above). It is applied by placing it over the small puck on puck wallet, then placing it over the wound or over affected area. If indirect pressure is needed, remove puck wallets. Continuous patient monitoring is vital when using the MRTD 16 device.
6-The MRTD 16 configuration for the Acromial and Dorsal regions:
The yellow tagged main belt strap goes around the armpit on the wound side and over the shoulder of the opposite side of the wound-between the neck and the shoulder.
The white tagged neck strap goes over the head and is snapped into the white tagged buckle.
The orange tagged strap is ran under the armpit-opposite one from the wound.
All straps are to be snug, then the air bladder over the wound can be inflated.
Note: Depending on the size of the wound, the large puck adapter or laceration block adapter may be needed in this region (see 7-7A and see videos above). It is applied by placing it over the small puck on puck wallet, then placing it over the wound or over affected area. If indirect pressure is needed, remove puck wallets. Continuous patient monitoring is vital when using the MRTD 16 device.
LACERATION BLOCK / LARGE PUCK ADAPTER
PUCK WALLETS
BELT EXTENSION FOR CROTCH, NECK OR BELT STRAPS
7- Use of the large puck adaptor or use of the laceration block: These adaptors can be used anywhere the puck wallets are installed, as the puck wallets can be moved to any strap on the MRTD 16 simply by taking them off of the slider belt which they are on. The belt extension (brown tagged) can be used where a buckle exists on the device to extend the straps.
INSTALL OF LARGE PUCK ADAPTER
INSTALL OF LACERATION BLOCK ADAPTER
7A- Install of the adapters on puck wallets and see videos above for further instruction.
8-Usage times:
Where no instance is exactly the same, these are suggested usage times for the MRTD 16 (and can/may vary): Continuous patient monitoring is vital when using the MRTD 16 device.
For: Abdominal/Pelvic/Umbilical/Femoral regions 1 Hour. Continuous patient monitoring is vital when using the MRTD 16 device.
For: Inguinal/Femoral/Gluteal/Lumbar/Sacral/Dorsal/Axillary/Sternal/Thoracic/Mammary/Acromial regions 4 Hours. Continuous patient monitoring is vital when using the MRTD 16 device.
Note: Constant monitoring of the patient along with checking of their vital signs is critical when using the MRTD 16. Watch and read ALL instructions and clearly comprehend/understand them in their entirety before any use of the MRTD 16 device. These instructions and videos are only a guide. You will need to determine the exact configuration you need to aid the injured party. You must be property trained or a physician or under the direction of a physician to use the MRTD 16 device.
Note: If any dangling strapping once pneumatic tourniquet trauma device is tightened, can be tucked in/tied off, or as a last resort cut if strapping is hindering movement-making sure that it is cut off 6-8 inches away from the buckle (Note: only if there is NOT a chance of it catching or coming loose from the buckle). Also, if the strap is not being used for your particular configuration, it is recommended to tuck in extra strapping, but still a judgment needs to be made for your particular configuration needed to know how to address the extra strapping if any.
Note: Using the MRTD 16 device incorrectly without proper training can cause severe bodily injury or even death to an adult, child or K9. In checking the Training required box at check out, you are agreeing to the terms set forth on the responsibility of using this device. Continuous patient monitoring is vital when using the MRTD 16 device.
See Terms & Conditions by clicking below. This device is Patent Pending.

